A look at the ABUS EC700/800
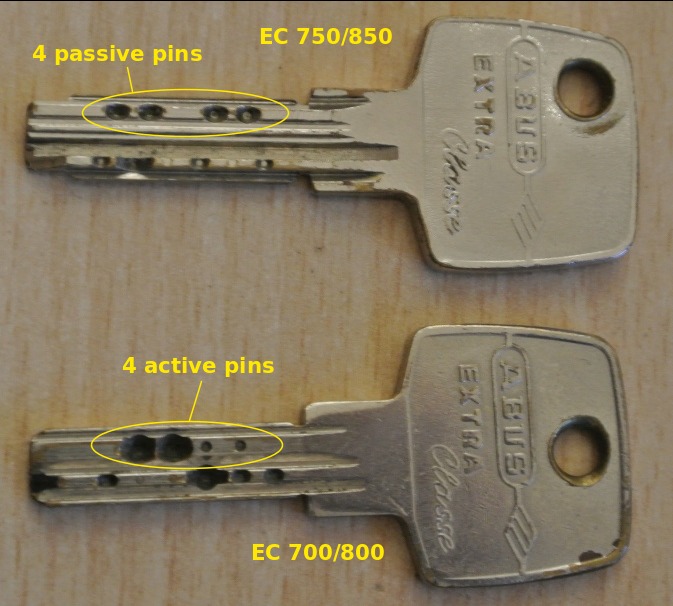
The ABUS EC 700/800 is an older dimple lock series that has been superseded for a while by the EC 750/850. Both series look somewhat similar, especially their keys. However, there is a huge difference between them: While the EC 750/850 has 6 active pins in its main row plus some passive pins from the top, the EC 700/800 has 4 active pins coming from the top in addition to its 6 main row pins. The total of 10 active pins itself wouldn’t be a big issue yet, if the top pins wouldn’t be exactly facing the bottom pins. With this design, the top pins are overlifted by the bottom pins in their default state. This makes the EC 700/800 one of the most difficult to pick pin tumbler locks.
Note: I think this lock was manufactured by CISA like its successor, but if someone could confirm that (and tell me how it was called), that would surely be helpful.
Note: The orientation is quite important when talking about this cylinder. I will call the 6 pins in main row “bottom pins” from time to time, while calling the second active row of 4 pins “top pins”. This matches the lock’s use as a euro profile cylinder in Europe. Sorry my American friends, you will have to think the other way around now ;)
Telling the difference
The differences between the EC 700/800 and the 750/850 are already visible when looking at the cores:
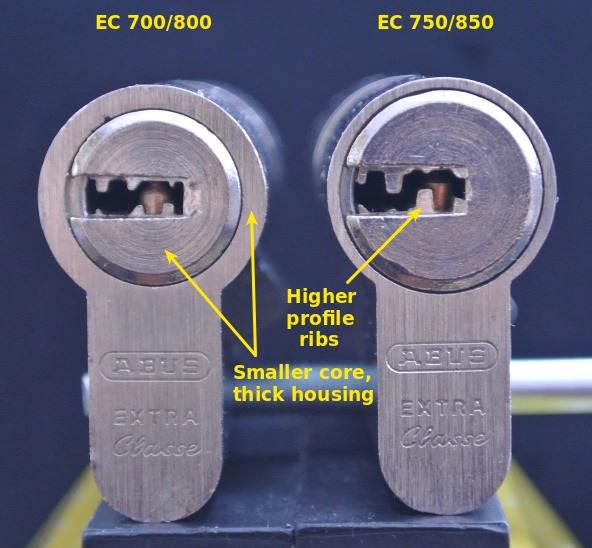
One can clearly see that the core of the EC 700/800 is smaller while the housing around it is much thicker. This design allows enough space for the driver pins and springs of the 4 active top pins.
Key and Pins
A look at the key already reveals some information about the position of the pins:
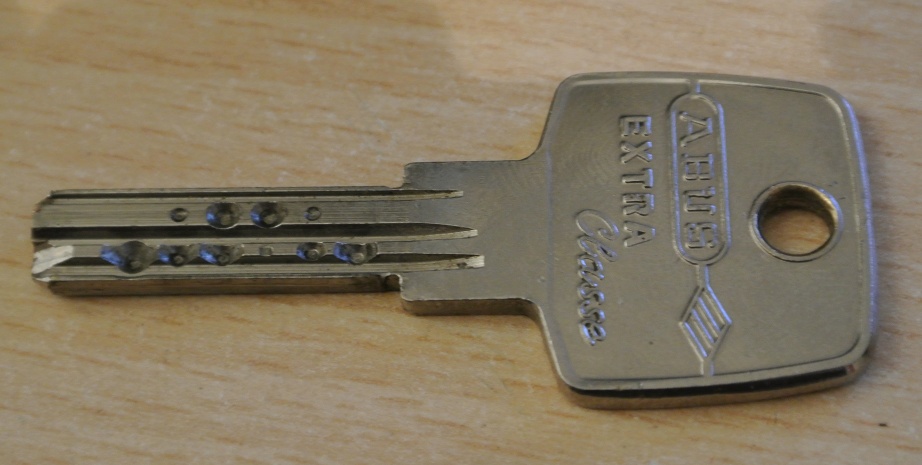
We can see that the bottom row consists of 6 pins, where pins 2-5 face the 4 pins in the top row. Note that the EC750/850 key also can have 4 holes in almost the same position, however, these holes are all the same depth and meant for the passive pins. So in order to distinguish the EC700/800 from the EC750/850 only by the key, just take a look at the 4 holes of the top row. If they have different depths, then it’s an EC700/800:
Here’s a picture of the pins used, posted by ingoingo on the Koksa Board:
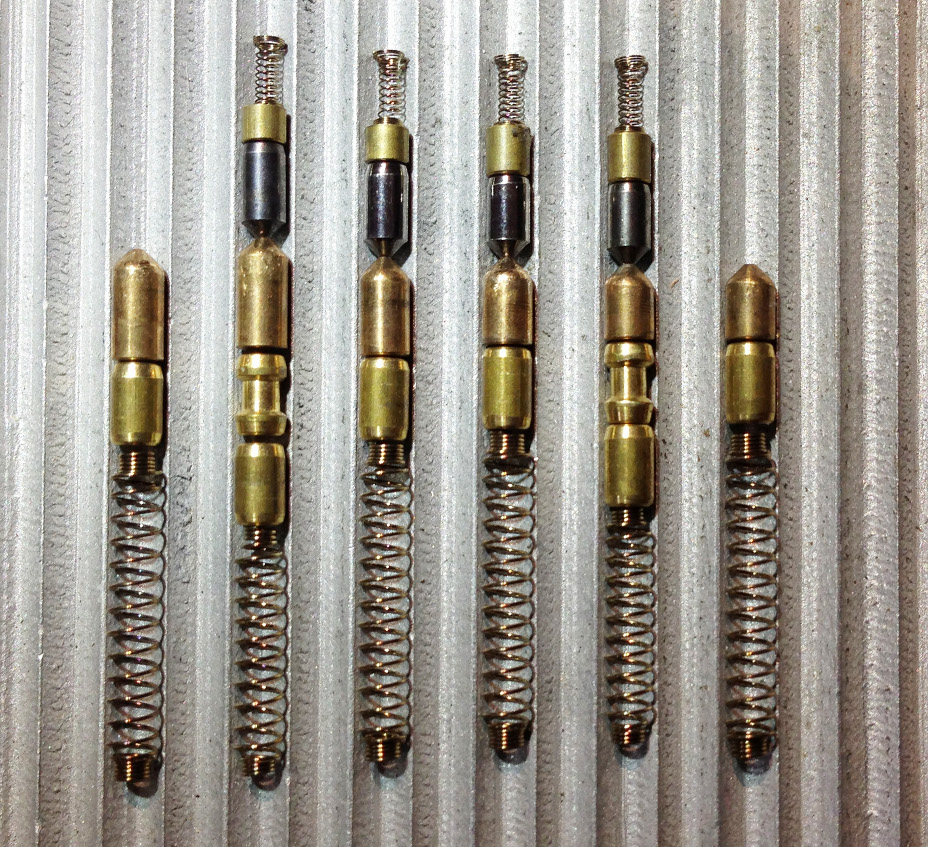
The position of the spools may vary, but having them at position 2 and 5 seemed like a very common thing for most of my cylinders. We can also see that all the driver pins have rounded ends, which makes them much harder to pick. Combined with the high accuracy of this cylinder, the rounded ends cause less feedback when setting a pin and require much more tension to stay in place.
The difficulty for non-destructive opening
As we’ve seen now, the top pins face the pins 2-5 of the main row while pins 1 and 6 of the main row do not have a corresponding upper pin. This is why by default, the top pins are not visible at all because they are entirely overlifted by the bottom pins which have stronger springs. If one starts to pick the main row now, then at some point, one of the top pins is likely to bind, but it will likely be still overlifted. Combined with a highly accurate manufacturing process, this makes it quite impossible to pick the lock the regular way. I’ve heard that some people raked some of these locks, but until now, there was no known reliable method for non-destructive opening that I know about.
After some experiments, I quickly found out though, that either clockwise or counter-clockwise, the top row binds and can be set entirely separate from the bottom row. Initially I used a piece of metal to hold down the main row pins and simultaneously tried to pick the top pins. After the top pins had been set, there was a fair (visible) amount of rotation and the main row was binding. This amount of rotation allowed to ease up the tension a bit and allow the main row pins to come back (since they will be overlifted now as well). Finally, this allowed the main row to be picked and the lock opened after a huge amount of time. The whole method was still very impractical though because the tool wasn’t very convenient and it also wasn’t clear if this would work with other models. Here’s a picture of the initial (successful) attempts:

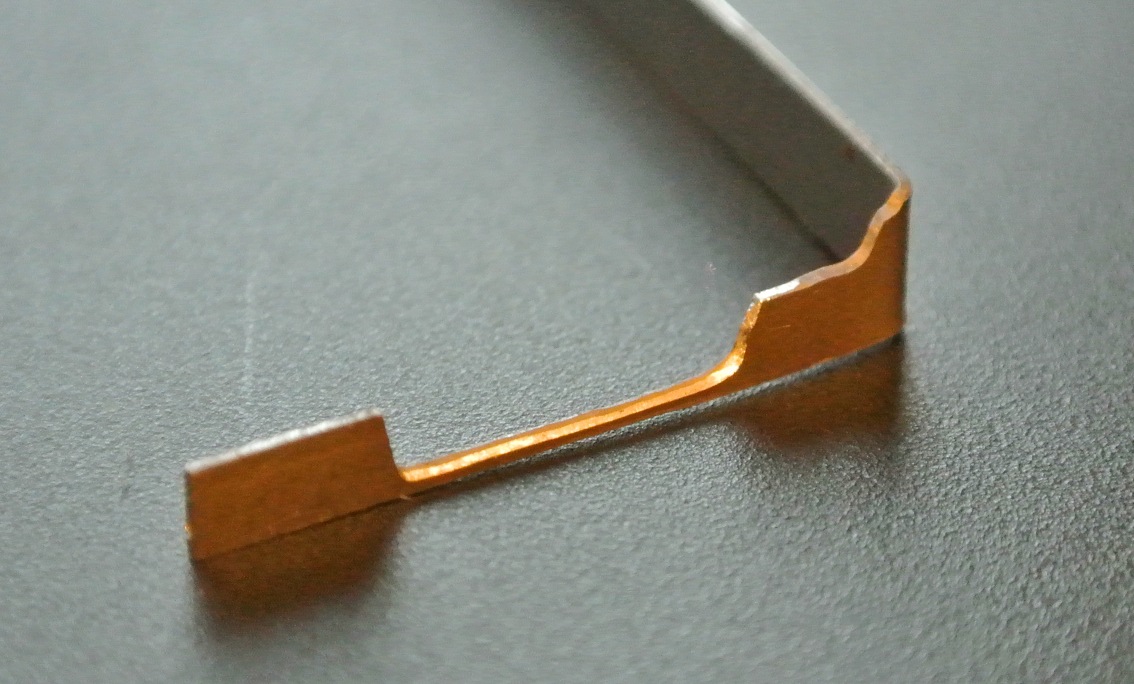
Creating a little helper tool
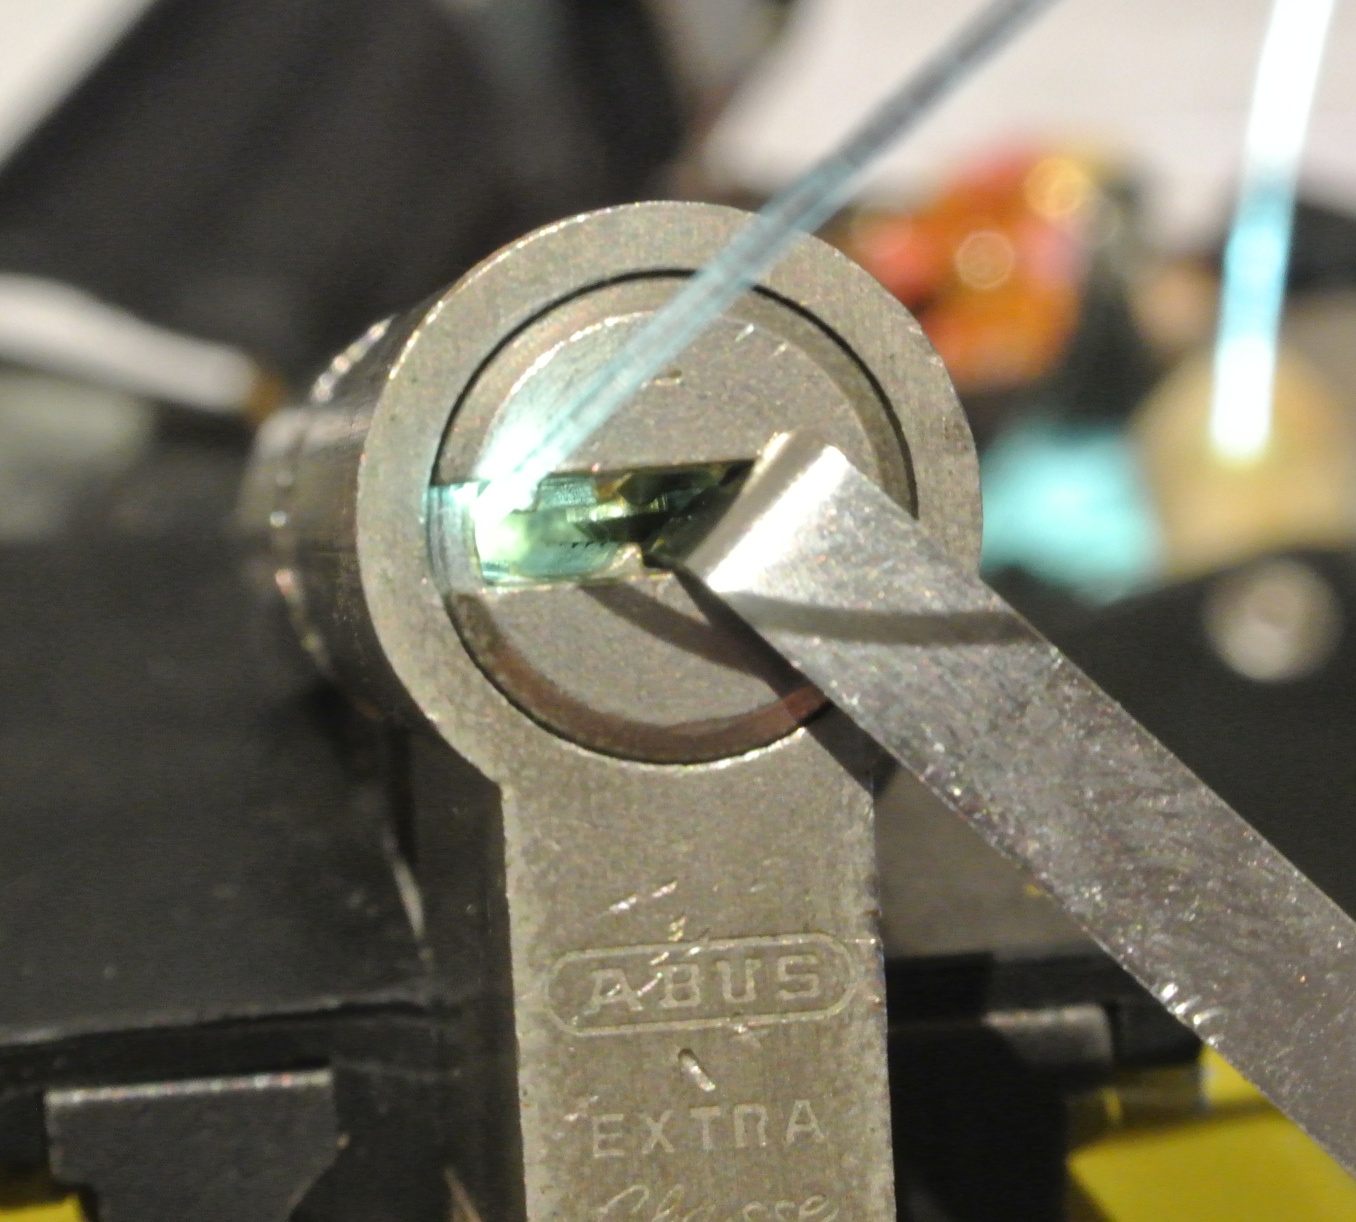
It took a while until I finally came up with a simple idea on how to hold down the bottom pins easily while picking the top pins. The idea was to use a long tension wrench diagonally inside the lock, holding down the main row and touching the upper right corner of the lock with the other side. However, in order to allow the top pins to freely move, the tension wrench would need a large hole in the middle, matching the position of the top row. My initial prototype looks like this:
Using this tool, I was able to open all of my 5 ABUS EC700/800 models either clockwise or counter-clockwise. When opening counter-clockwise, the tool acts both as a tension wrench and to hold down the bottom pins. When opening clockwise, a second tension wrench is required to apply tension and the tool solely holds down the pins:
Result and Conclusion
This is the result of a few hours of picking time:

While this lock can also be opened non-destructively as shown, I think that the design is something that deserves appreciation and more popularity. Having several locking elements overlifted by default (when no key is inserted), is an effective way to increase manipulation difficulty. Not only does this make manual picking very hard, but it also effectively prevents bumping and other semi-automatic methods. I could imagine that one of the problems was that the top springs would fail earlier since they’re under tension all the time, but this could probably be resolved by investing more into robust springs for the top row.
blog comments powered by Disqus